
Image properties
Overview
A double-click on an inserted image opens this dialog. Every change takes effect on the image in the drawing immediately.
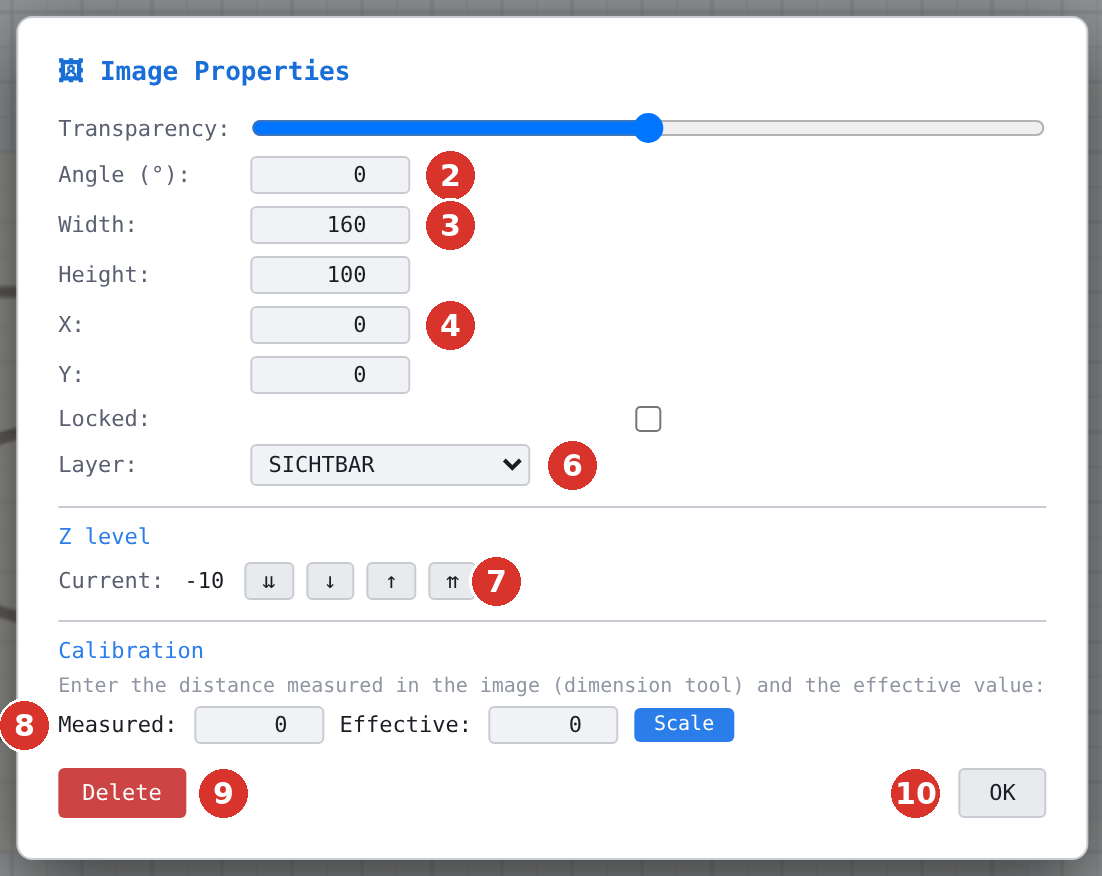
The fields
| Field | Meaning |
|---|---|
| Transparency | opacity of the image from 0 to 100 % (factory: 50 %) — the more translucent, the better the geometry drawn on top can be seen |
| Angle (°) | rotation of the image |
| Width / Height | size in drawing units; 0 is not allowed (“Width/height must not be 0 — check the values”) |
| X / Y | position of the lower left corner |
| Locked | the image can neither be selected nor moved — the template stays put while you draw |
| Layer | layer of the image |
| Z level | “Current” with the buttons ⇊ right to the bottom, ↓ one level down, ↑ one level up, ⇈ right to the top; new images sit behind everything |
| Calibration | enter “Measured” and “Effective”, “Scale” recalculates the image |
| “Delete” | removes the image from the drawing |
| “OK” | closes the dialog |
Calibrating
A photo or a scan has no scale. This is how it gets one:
- Measure a distance in the image whose true length is known, using Measure.
- Enter the value read off under “Measured”, the true length under “Effective”.
- “Scale” — the image is enlarged or reduced by the ratio. The status bar reports “Image scaled: ×f (a → b)”.
Tip
Set the lock after calibrating. Otherwise an accidental drag moves the template and none of the geometry already traced fits it any more.