
Drawing — the first steps
All drawing tools of LiberoDraft follow the same pattern: choose the tool, click points or type values, confirm with Enter. Whoever masters line, rectangle and circle knows the procedure of all other tools as well.
Choosing a tool
A drawing tool is started in four equivalent ways:
- Ribbon: group Draw — Line, Rectangle, Circle and the further tools. Buttons with a triangle open a list of related tools.
- Classic toolbar: the same buttons in the toolbar.
- Key: N line, R rectangle, C circle (shortcuts work when no input field has the focus).
- Command search (Ctrl + F): type the name, Enter.

The instruction field at the left below the ribbon shows for every tool which step is expected next (1. Klick = Startpunkt der Linie setzen). The status bar adds snap mode and pointer coordinates.
In addition most tools show a tooltip at the pointer naming the same step briefly, often with a grey line for the detail and the cancel key. A detailed example with all three displays is shown at Angle from 3 points.
Since program version v3.0.33 a message that a tool sets while finishing stays in the status bar: success messages such as Arc length dimension placed as well as hints about unusable input, for instance The 3 points are collinear. Before that they were replaced by Ready at once and could not be read. Ready now only appears when a command ends or is cancelled without a message of its own (Messages).
Click or type: the flying input field
After the first click a preview follows the drawing. At the same time the flying input field appears next to the pointer with the values that are being created — length and angle for the line, width and height for the rectangle, radius and diameter for the circle. The values follow the mouse.

You now have two possibilities:
- Second click at the desired position — the value comes from the pointer position (with object snap).
- Type the value and Enter — the first field is already selected, typing overwrites it. Tab switches to the next field (for example from the value to the angle). A typed value stays even if you keep moving the mouse; the other field keeps following the mouse.
The space bar switches the input between polar (length L and angle ∠) and cartesian (ΔX and ΔY) — also while the input field is open. The same switch is offered by the button 📐 L/∠ or 📐 ΔX/ΔY at the left of the status bar (Coordinate mode). The choice is saved.
Values may be typed with comma or point (12,5 and 12.5 are the same). The angle is measured counter-clockwise from the positive X axis.
Start point by coordinate
If the first point of a tool is to lie on an exact coordinate, press K after choosing the tool (Coordinate entry). A field for X and Y (cartesian) or length and angle from the origin (polar) appears; Enter sets the start point, then the tool continues normally.
Object snap
While drawing, the pointer snaps to significant points of existing elements: endpoints, midpoints, intersections, circle centres, points on an element. A small symbol with a label shows what is being snapped.


After the start the snap is set to Automatic: the program chooses the suitable snap type itself. With the keys E (endpoint), M (midpoint), S (intersection), Z (center), L (element), P (point), G (grid) and F (free) you fix one snap type; Q returns to automatic. The active snap is shown in orange in the status bar. All snap types: Snap mode; which snap types the automatic considers: Automatic snap dialog.
Ortho and tracking
With ORTHO (switch at the right of the status bar) lines are drawn only horizontally or vertically — the preview jumps to the nearer axis. TRACK (object snap tracking) shows guide lines through snap points over which you have paused briefly; this way you hit points that are aligned with existing points. Shift + T sets a tracking point at the pointer, Shift + M a tracking point midway between two points. Details: Tracking and ortho.
Cancelling and finishing
Esc cancels the running tool; a started line is not drawn. The line continues automatically at each endpoint (line chain); Esc, an empty Enter in the input field or the entry Cancel in the right-click menu ends the chain (a second right-click while the menu is open as well). After cancelling, the tool stays selected — V or Select returns to selection.
A first drawing
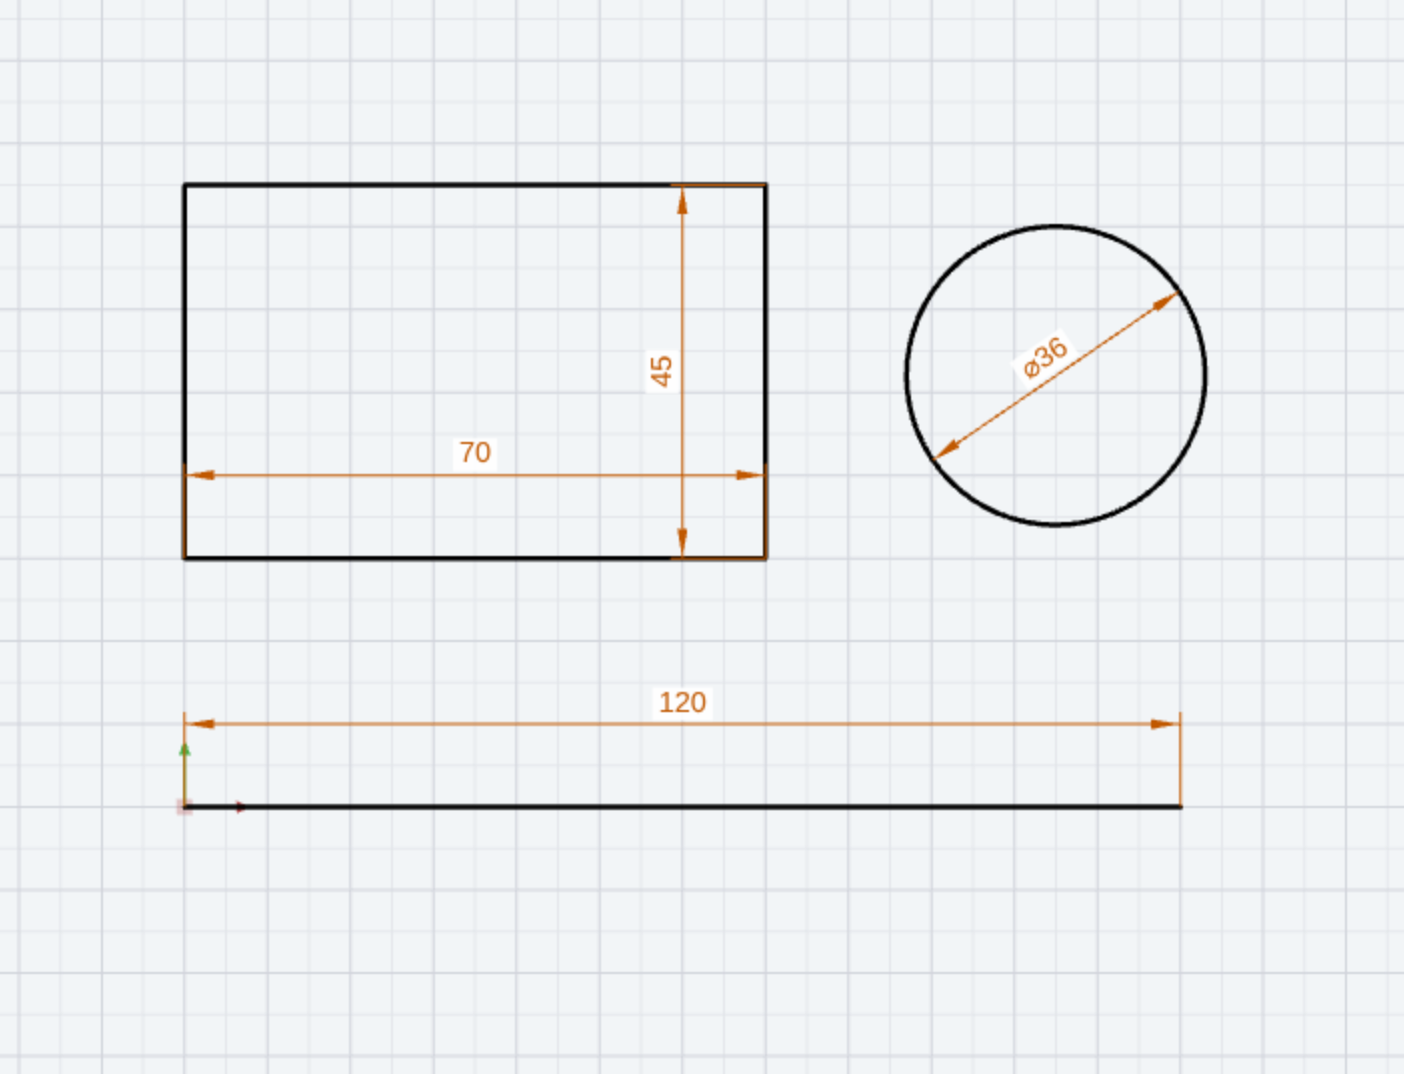
This is how the picture above is made: press N, click on the drawing area, type 120, Tab, type 0, Enter, then Esc. Press R, click a corner, 70 Tab 45 Enter. Press C, click a centre, 18 Enter. The dimensions are created along as long as the checkbox Create dimension while drawing is set (factory: on). Step by step: Create a first drawing.