
Screen layout
The LiberoDraft screen is divided into seven areas. This page names them and says what each one is for.
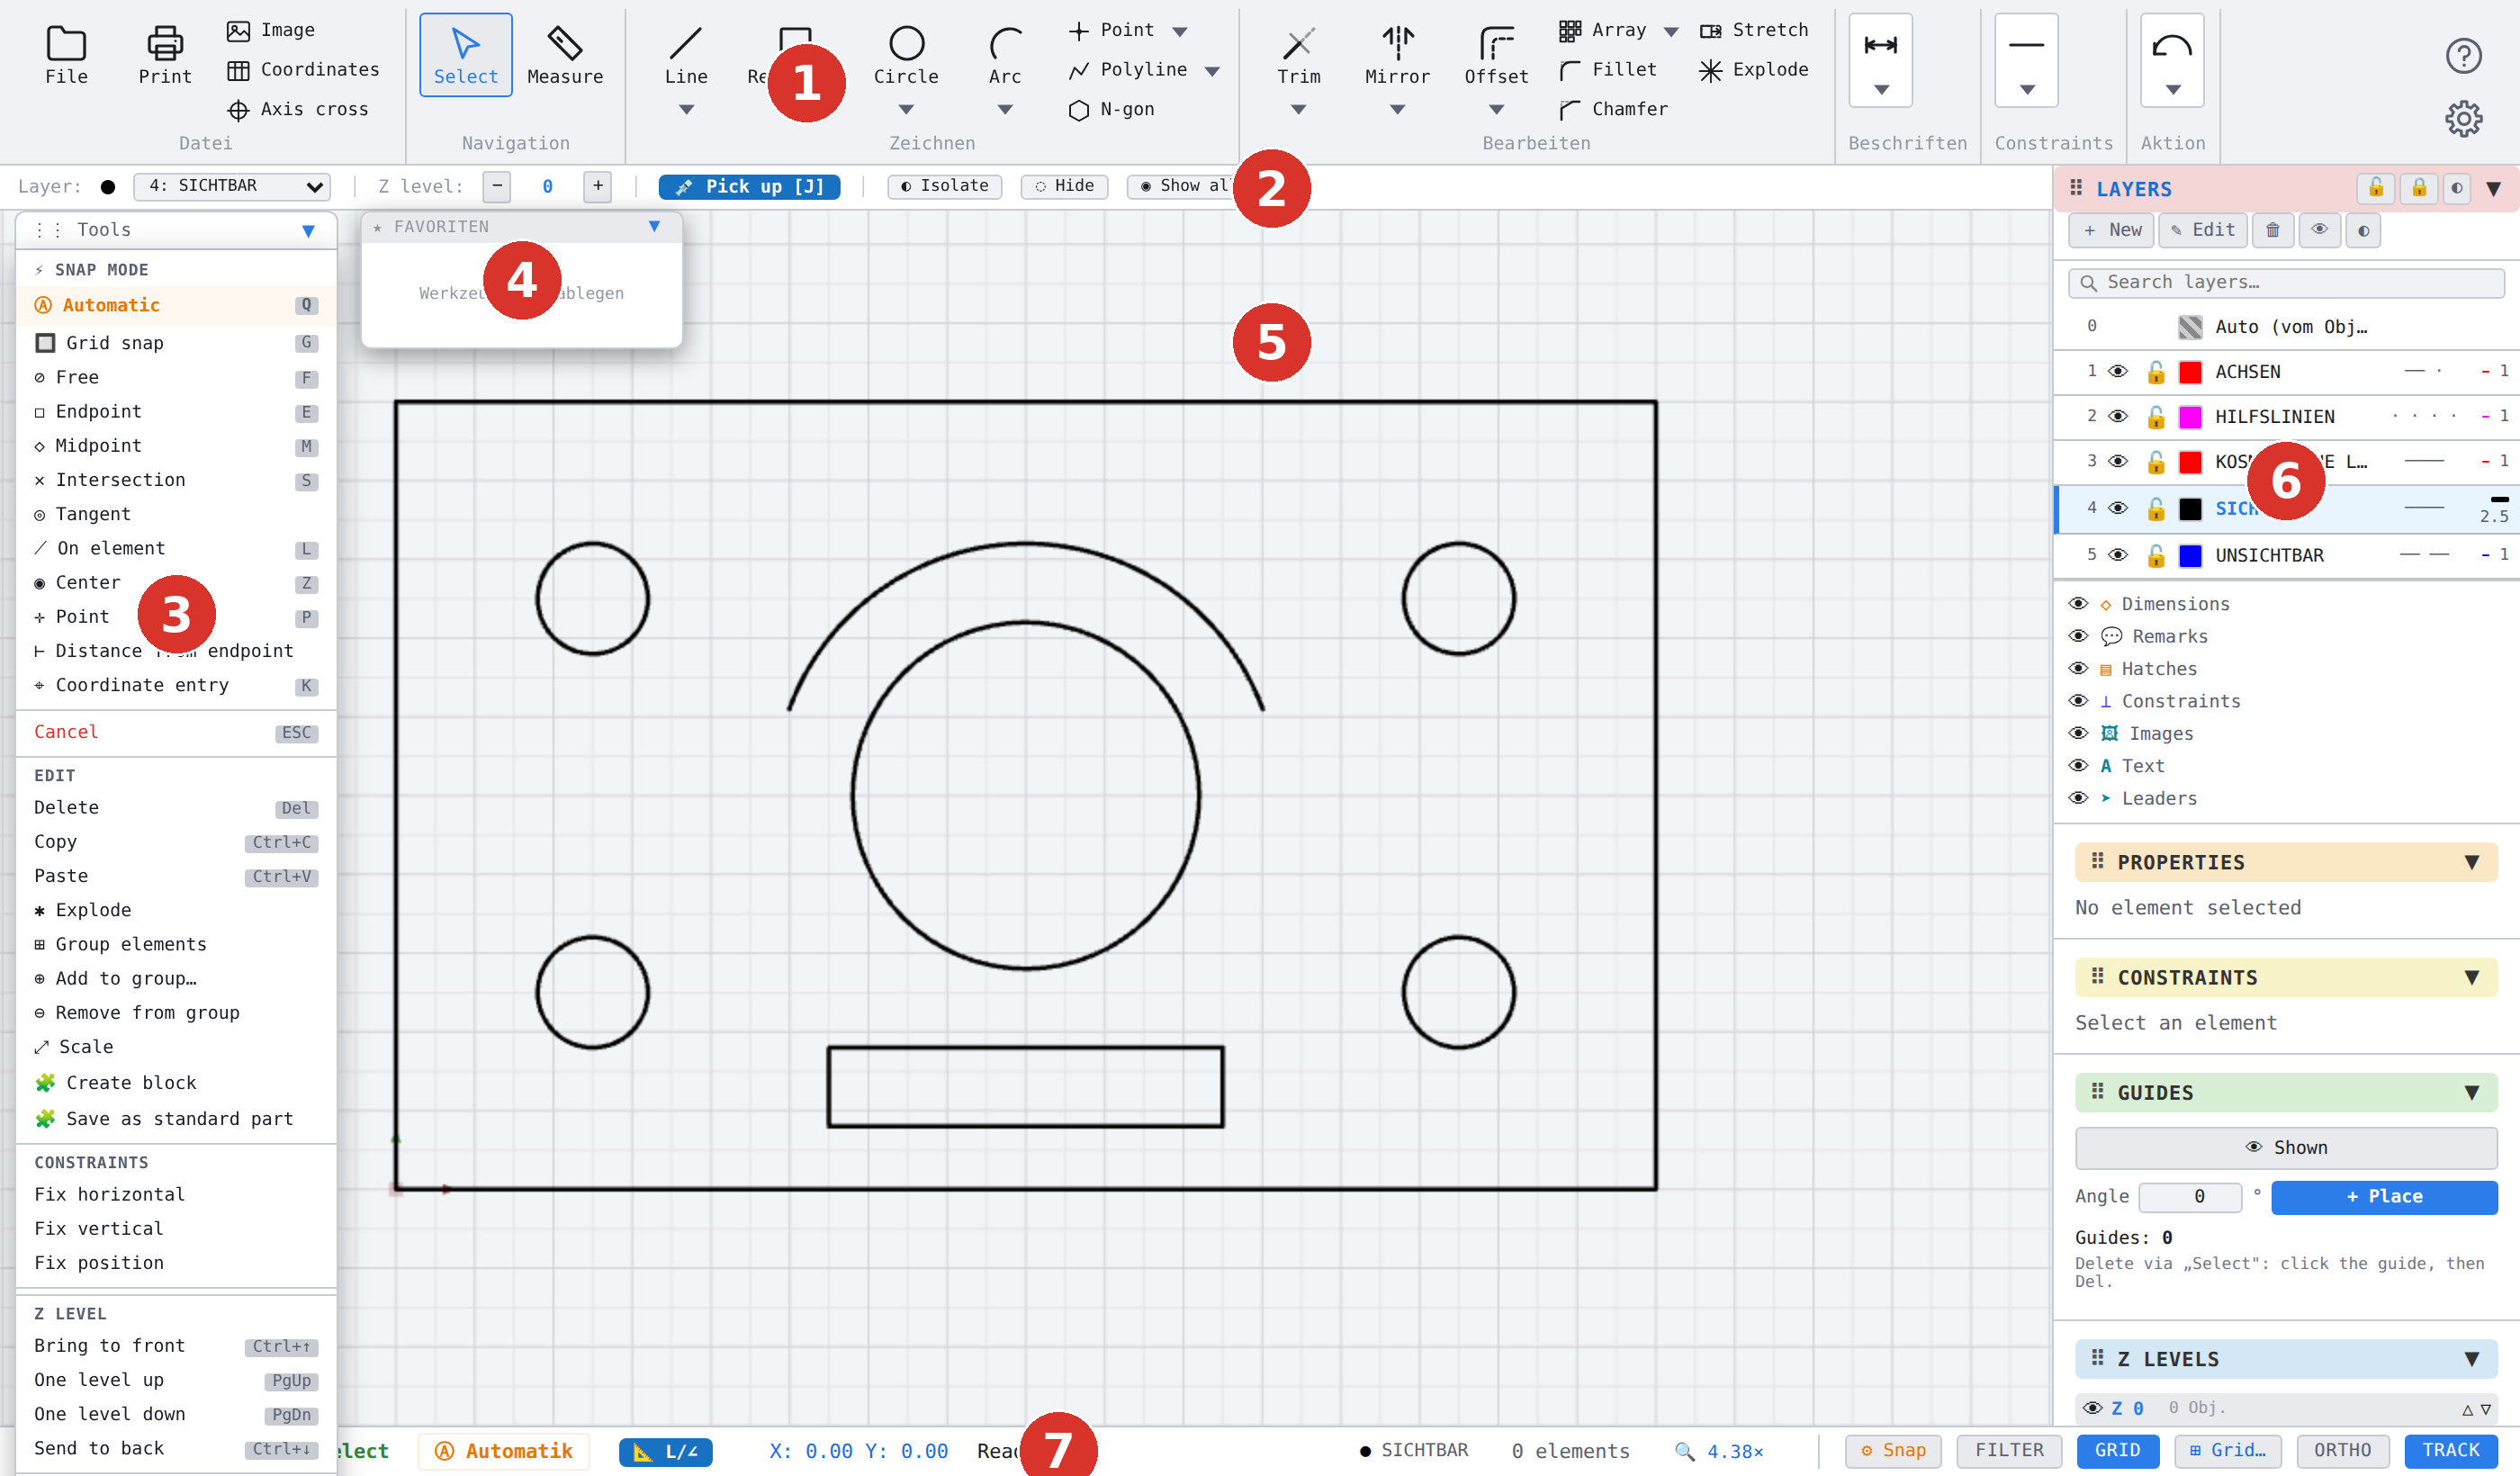
The seven areas
| No. | Area | Purpose |
|---|---|---|
| 1 | Ribbon | All commands grouped by subject; can be replaced by the classic toolbar. At the far right the help button and below it the gear for the settings. |
| 2 | Header above the drawing area | Current layer, Z level and the buttons for picking, isolating and hiding. |
| 3 | Tool window | Snap mode, editing commands, constraints and Z level; freely movable. |
| 4 | Favourites | Your own selection of tools for quick access. |
| 5 | Drawing area | The drawing itself with grid and origin. |
| 6 | Palettes on the right | Layers, properties, constraints, guide lines and Z levels. |
| 7 | Status bar | File name, sheet tabs, coordinates, element count, zoom and the switches for grid, ortho and tracking. |
Ribbon or classic toolbar
LiberoDraft offers two equivalent user interfaces. The Ribbon arranges the commands in labelled groups and shows a lot at a glance.

 left half
 right half
The classic toolbar needs less height and is familiar to users of other CAD programs.

 part 1 of 3
 part 2 of 3
 part 3 of 3
Both interfaces run the same commands. You switch with the gear on the right (switch Layout: Ribbon / Classic), with a right-click on an empty spot of the ribbon or the toolbar (entry Switch to the classic toolbar / Switch to the ribbon in the right-click menu of a button), with the key F2 or Ctrl + Shift + R, or via the command search (Ctrl + F, entry Switch ribbon / classic toolbar); the change applies at once and the status bar confirms it. Command: Switch ribbon / classic toolbar; all settings: Setup and settings.
In both layouts the button Online help — it opens this help in a new tab — and the gear Settings with the settings functions sit at the far right; one above the other in the ribbon, side by side in the classic toolbar.
Status bar
The status bar is the program's most important feedback: it shows the running command, the active snap mode and the pointer coordinates. On the right are the snap button, the selection filter, the grid and the switches for ortho and tracking.

 left half
 right half