
Tracing an image as a template
Goal
Turn a paper drawing, a photo or a screenshot into a real CAD outline.
Steps
- Create a layer of its own, “VORLAGE” for example, and make it the active layer.
- Ribbon, group “File” → button Image (3), choose the image file.
- Measure a distance in the image whose true length is known, using Measure.
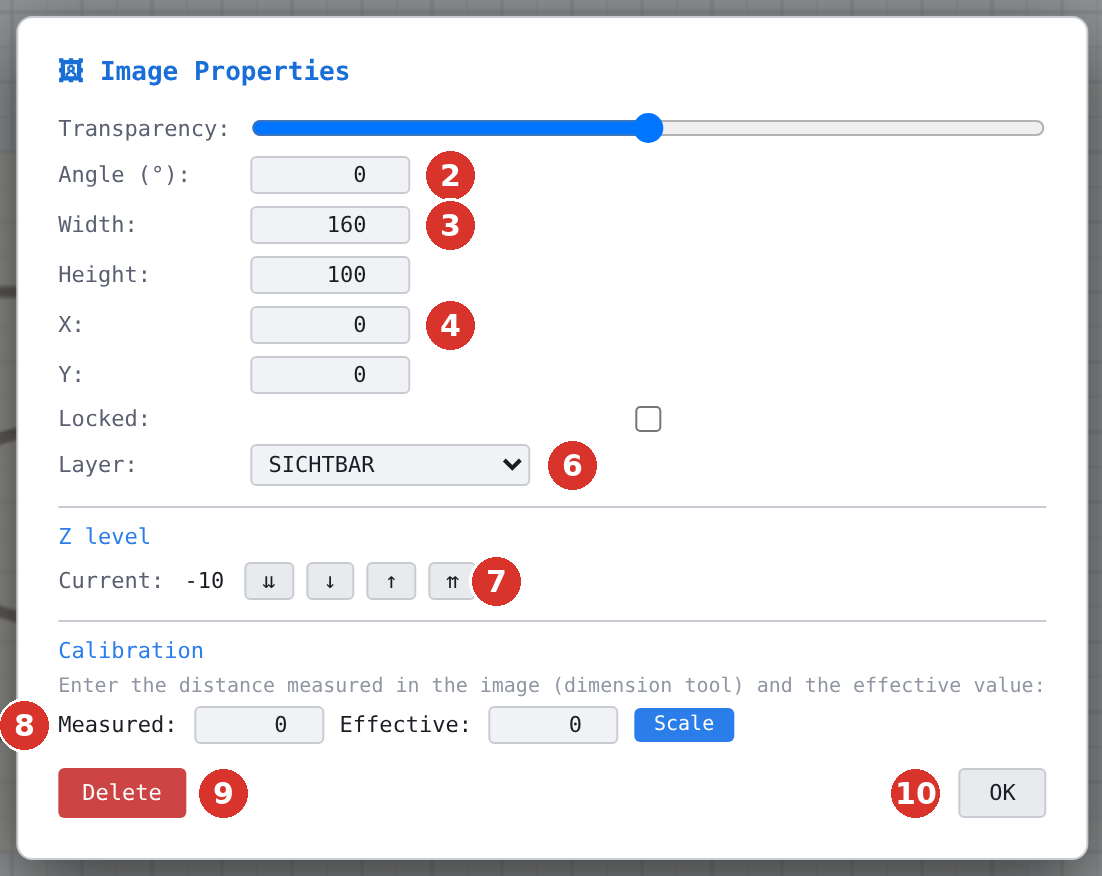
- Double-click the image: in the dialog “Image properties” enter the measured and the effective value under “Calibration”, then “Scale”.
- Tick “Locked” and close the dialog with “OK”.
- Switch to the drawing layer and trace the outline over the image; the 50 % transparency lets you see both.
- Finally hide the layer “VORLAGE”.

Result
A drawing to scale whose template can be shown again at any time — it does not appear in the print.
Note
Images are exported neither to DXF nor to SVG; the traced geometry is.