
Setup and settings
LiberoDraft remembers its settings by itself: every change is stored in the browser of the computer shortly afterwards and applied again at the next start. This page shows where the settings live (there are four places), what they do and which of them stay on the computer or travel with the drawing.
The four places of the settings
| Place | Access | Content |
|---|---|---|
| Gear window | gear at the right of the ribbon or the classic toolbar | the five settings functions (dimensions, hatch, setup, day/night, info) and the layout of the ribbon |
| Settings dialog (Setup) | gear → Setup or the command Save/load settings | language, input mode, precision, drawing & snap, appearance, dimension layer, view & mouse, line types, save/load/transfer/factory defaults |
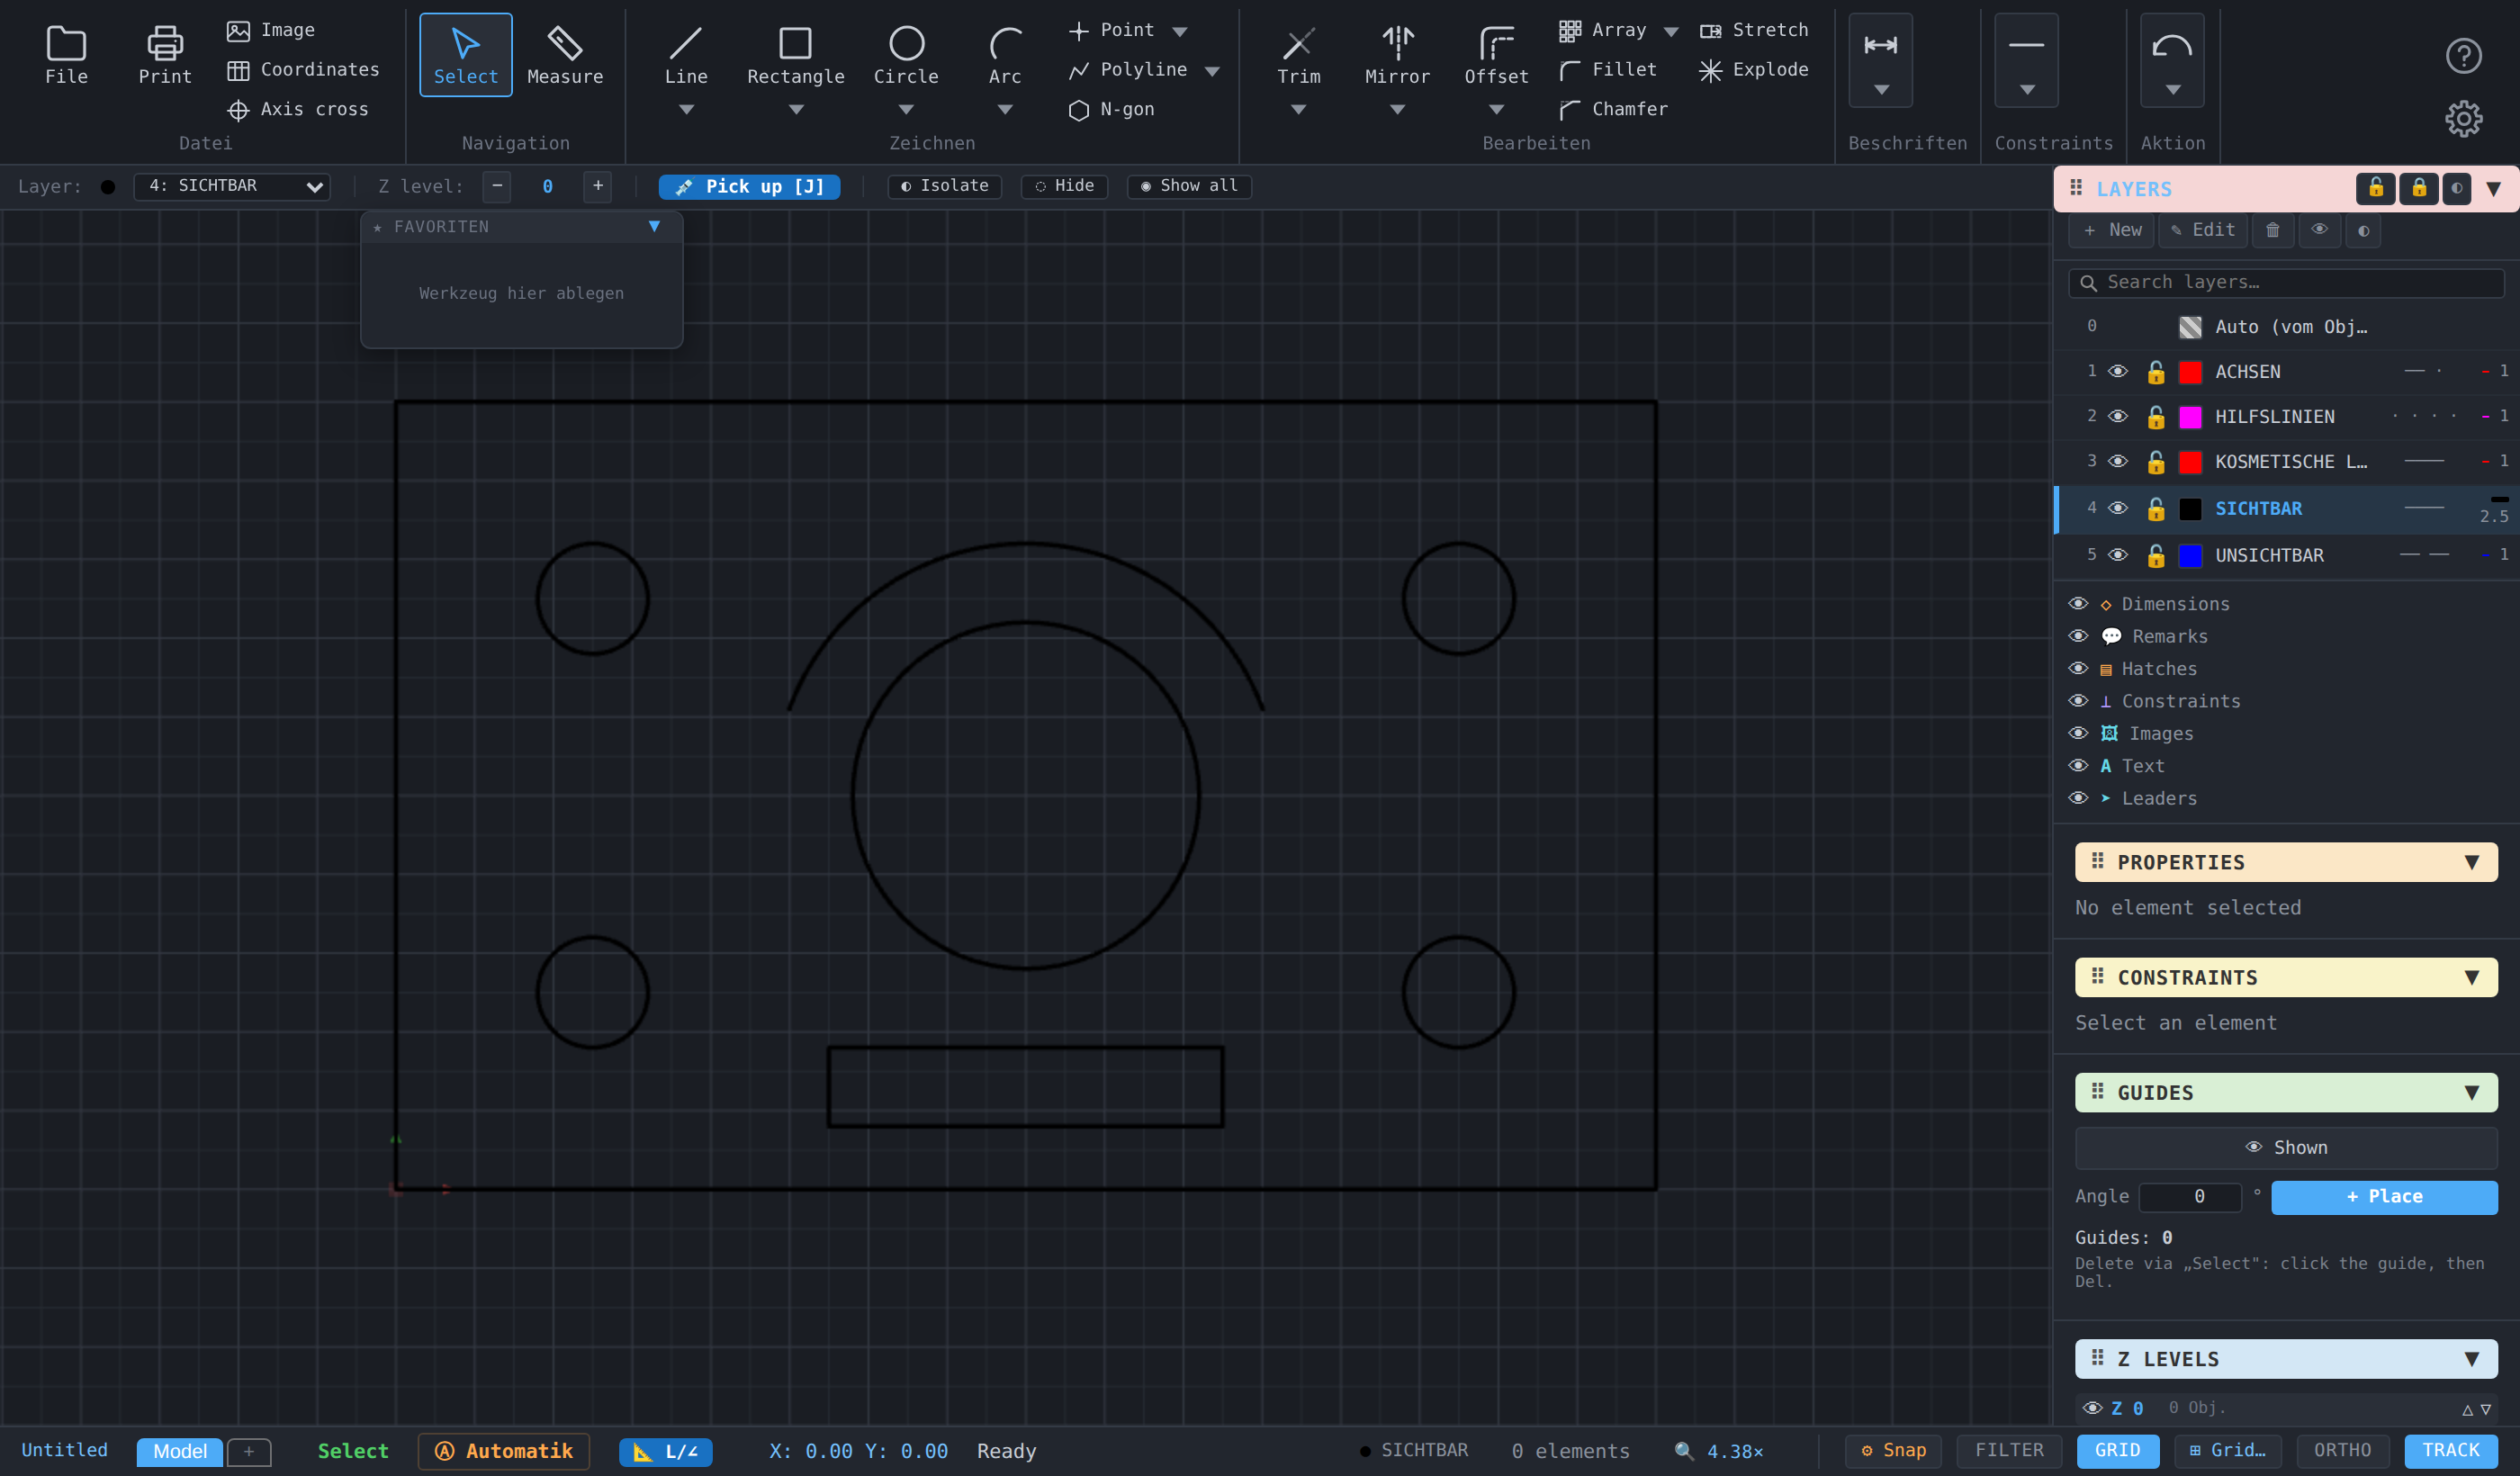
| Status bar, right side | buttons ⚙ Snap, GRID, ⊞ Grid…, ORTHO, TRACK | snap automatic, grid on/off and fine settings, ortho mode, object snap tracking, icon size of the classic toolbar |
| File menu | entries Drawing info…, Keyboard shortcuts, DXF profiles… | drawing data, key overview, layer and line type mapping for DXF |

The classic toolbar has no separate ⚙ button for dimensions or hatching: in both layouts all five functions sit in the gear on the right. In classic mode the window shows only the Layout row — the other rows concern the ribbon alone.
Ribbon or classic toolbar
The row Layout: Ribbon / Classic in the gear window switches the user interface. The key F2 (or Ctrl + Shift + R), a right-click on a free spot of the bar and the command Switch ribbon / classic toolbar do the same. The choice is remembered; the factory default is the ribbon. Only the ribbon uses the rows Icons (S/M/L/XL, icon size), Text (S/M/L/XL, label size — independent of the icon size), Font (Default, Segoe UI, Arial, Verdana, Tahoma, Calibri, Consolas — for button labels and group names only), Spacing (Tight/Normal/Wide: button width, padding, gap, group margin) and Remember variant (ON: a split button shows the tool last chosen from its family as its icon; OFF: always the first one). The icon size of the classic toolbar, by contrast, is in the ⊞ Grid… window of the status bar (Icons: S/M/L/XL). Structure of both interfaces: Screen layout.

Day and night mode
The entry Night mode or Day mode in the gear window (the text names the target state) switches between the light and the dark interface — also via the command Day/night mode. The colour of the dimension texts follows: the factory orange is darker in day mode (#c05800) and lighter in night mode (#ffa94d) so that it stays legible on both backgrounds. The choice is kept in the key cad2d_theme and in the settings; the factory default is day mode.
Grid
The grid is both a visual aid and a snap target. In the status bar GRID switches the display on and off; ⊞ Grid… opens the small window with Size (mm), Dyn. and Contrast (10–100 %). With the dynamic grid (factory on) the program picks the level itself while zooming, from 1, 5, 10, 50 and 100 mm: it takes the finest level that is at least 8 pixels wide on screen; the major lines lie on the next level. If even 100 mm gets narrower than 4 pixels, the grid disappears completely. If you type a size, Dyn. switches off and the major lines lie at five times the size. Grid snap (G, status bar Grid) snaps to the crossings of the current level — on request also with the grid hidden (checkbox Grid snap even when the grid is hidden in the Auto Snap Settings dialog, factory on). If tracking is on, the free coordinate of a track point snaps to the grid as well. Details: Status bar, how-to Set up the grid.


Snap automatic
The snap mode Automatic (Q, factory default) looks for all enabled snap types at the pointer at the same time. Which ones these are is defined in the Auto Snap Settings dialog (⚙ Snap in the status bar): endpoint, midpoint, intersection, center, nearest point on element, tangent point and drawn points (all factory on). The dialog also holds auto-weld — nearby endpoints are joined into one common point while drawing (fixed tolerance, factory 0.01 mm, or coupled to the snap range). Calling a geometry tool switches the snap back to automatic; this can be turned off in the Settings dialog under Snap to automatic for geometry tools. How-to: Adjust the snap automatic.

Tracking and ortho
TRACK (factory on) is object snap tracking: if the pointer rests briefly over a snap point, it is captured as a track point (+); horizontal and vertical guide lines start from it, the pointer snaps onto them and the intersection of two tracks snaps exactly. Shift + T sets a temporary track point at the pointer, Shift + M the midpoint between two points. ORTHO (factory off) restricts drawing to horizontal and vertical directions. Both switches confirm in the status bar (Object snap tracking ON — briefly touch a snap point to capture it as a track point, Ortho mode ON).
Coordinate input: polar or cartesian
While drawing, the floating input field shows either length and angle (polar, L/∠, factory) or ΔX and ΔY (cartesian). Toggle: Space (also with the input field open), click on 📐 L/∠ at the far left of the status bar or the list Input while drawing in the Settings dialog. The program remembers the choice. The hint box for the coordinate toggle explains the switch the first time; it can be turned off in the dialog. The distance of the input field from the crosshair is Distance to cursor (10–100 px, factory 30).

Language
The list Sprache / Language in the Settings dialog (Deutsch, English) switches all labels, tooltips and messages immediately; the choice is saved. Without a saved choice LiberoDraft follows the browser language at the first start (German → German, otherwise English). How-to: Change the language.
Units and precision
LiberoDraft works in millimetres; all field values of the settings are mm or screen pixels where stated. The display unit of the dimension texts (mm, cm, m, m/cm building) is a dimension setting. Global precision in the Settings dialog defines how finely the program calculates and compares internally: Coarse (0.01), Standard (0.0001, factory), Fine (0.000001), Very fine (1e-8).
What stays on the computer, what travels
LiberoDraft stores in the browser (localStorage) of the respective computer — that is, separately per browser and per Windows user:
| Key | Content | Behaviour |
|---|---|---|
| cad2d_settings | all program, drawing, print and dimension defaults, layer list, favourites, window positions, ribbon layout | written automatically after every change; applied at start |
| cad2d_theme | day or night mode | written when switching |
| liberodraft_dimstyles_v1 | your own dimension styles | separate key, travels with the transfer |
| cad2d_dxfProfiles, cad2d_dxfActive | DXF profiles and the active profile | local only, additionally saveable as a file |
| cad2d_iconSize, cad2d_panelSections, cad2d_autor, window states | icon size of the classic toolbar, collapsed panel sections, last author entered, collapsed windows | travel with the transfer |
| cad2d_panelW | width of the panel on the right | stays on the computer — it depends on the screen |
| cad2d_registered, cad2d_launchCount, cad2d_lastLaunch, cad2d_disclaimerAck, cad2d_constraintExpAck | registration, launch counter, confirmation of the disclaimer and of the constraint note | stay on the computer and are never transferred |
Not part of the settings: the drawing content (elements, dimensions, hatches, blocks, groups, layouts), the selection, the view (zoom, pan, active sheet), the undo history and the visibility of the system layers (dimensions, hatches, constraints, images, text, leaders) — that lives in the drawing, and a restart deliberately begins with everything visible. The layer list, however, is stored both as a default (for new drawings) and in every drawing file. The data of the drawing info is kept in the drawing file.
Save, load, transfer, reset
The box Manage settings in the Settings dialog offers Save locally / Load locally (write the key cad2d_settings explicitly or apply it again), Export (JSON) / Import (JSON) for moving to another computer (the file cad2d_settings_YYYY-MM-DD.json contains everything from the table above that does not stay on the computer — including your own dimension styles and DXF profiles), Panel order (only the order of the sections in the right panel back to factory, torn-off sections return) and Factory defaults (everything back to the delivery state — after confirmation, not undoable; your own dimension styles and drawings remain). Details field by field: Settings dialog, how-to Transfer settings to another computer.

Dimension layer
The box Dimension layer holds the Layer name (factory Mass). If the drawing contains a layer with this name, new dimensions, feature control frames, datum features and balloons land there — otherwise on the active layer. Visible is the same switch as the eye of the system layer Dimensions. Context: Dimensioning — Z level, layer, visibility.
Information about the program and the drawing
- Drawing info: number, title, revision, scale, paper, author, tags, notes — stored in the drawing file; number, title and revision form the suggested file name.
- Info / About: version, launch counter, users worldwide, publisher, disclaimer, licenses; the checkbox Disclaimer understood suppresses the info box at start.
- Keyboard shortcuts (F1): thematic key overview from the program.
- Online help : opens this help in a new tab.
Related topics
- Dimension settings and Hatch settings — the two specialist dialogs in the gear window
- Messages about settings, grid, snap, language and layout
- Keyboard shortcuts