
Selecting and changing
Before anything is moved, copied, deleted or recoloured, it has to be selected. The tool Select (V) is the basic tool of LiberoDraft; after every cancel with Esc and V you return to it.
Selecting single elements
A click on an element selects it and highlights it in blue; the selection replaces a previous one. Shift + click adds a further element to the selection or removes an already selected one. A click into empty space clears the selection. When hovering, the element under the pointer already lights up, so you see before clicking what will be hit.
Dimensions and hatches can be selected as well: a click on the dimension line grabs the dimension, a click into a hatch area the hatch — provided no element lies underneath. The selection filter FILTER in the status bar defines which object types — and which colours, line types and line widths — may be selected at all.
Selecting several: the rubber band
A click into empty space with the mouse button held down drags a rubber band. The direction decides:
- From left to right (blue rectangle): only what lies completely inside the rectangle is selected (window selection).
- From right to left: everything that touches or crosses the rectangle is selected (crossing selection).
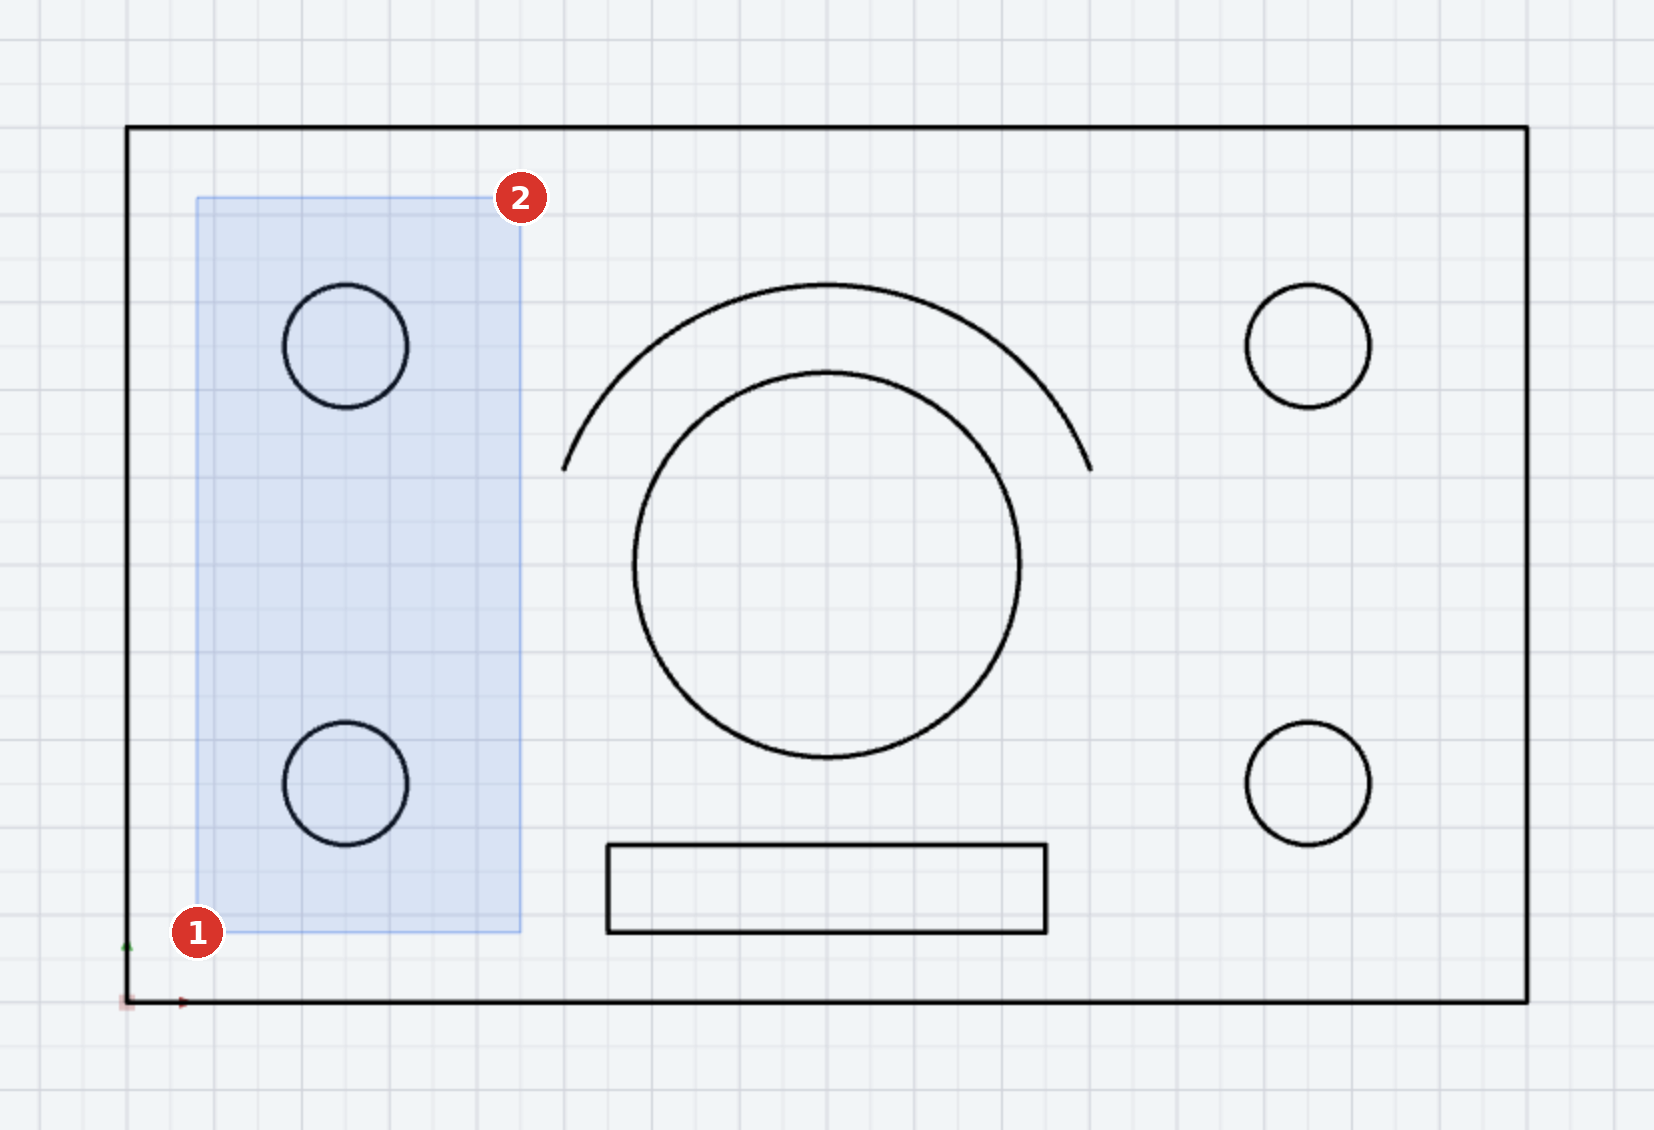
Ctrl + A selects all visible, unlocked elements including dimensions and hatches (Select all). Elements on hidden or locked layers are never selected.
What appears after selecting
With a selection the gizmo appears at the element — an axis cross with grips — and next to it the gizmo window with the position of the reference point (WELT X/Y), fields for a displacement by ΔX/ΔY, rotation angle, radius and the layer row of the selection.

- Dragging the red or green arrow moves the selection along one axis, dragging the centre moves it freely; the arc grip rotates. Hold Shift while dragging the centre and, since program version v3.0.46, the selection also runs along one axis only — horizontal or vertical, or along the arrows if the gizmo is aligned to a line. The axis with the larger mouse travel wins.
- A value in the ΔX/ΔY fields and OK moves by the exact amount.
- In addition the Properties panel on the right shows all attributes of the selected element for direct editing (radius, coordinates, layer, colour, line style, Z level).
The gizmo can be switched off and on with Ctrl + Shift + G; all details: Gizmo.
Grips: dragging endpoints
On one selected element small squares appear at the endpoints and midpoints (grips). A click on a grip picks it up, a second click puts it down — in between the point follows the mouse with object snap. Connected elements with a common point move along; the status bar reports Grip placed.
From two selected elements on, since program version v3.0.46 there are no grips any more — neither the point squares nor the arrow grips for lengthening and shortening; they are neither drawn nor can they be grabbed. In their place a dashed frame encloses the common outline of the selection. The gizmo stays and moves, rotates and scales the whole selection.

The right-click menu
A right-click on the drawing area opens the context menu. Depending on the situation it offers the snap mode as a submenu, Pick up attributes, Properties (also by double-click), Cut, Copy, Paste, Isolate, Hide, Show all objects, the group and block commands and Cancel. For a dimension, text or image the matching editing entries are added.

Delete, undo, redo
Del or ⌫ deletes the selection including attached dimensions and constraints (Delete). Every change step can be taken back with Ctrl + Z and repeated with Ctrl + Y — up to 50 steps (Undo, Redo). In the ribbon the three commands are in the group Action, in the classic toolbar on the right.

 left half
 right half
Move, copy, mirror …
The actual modification commands — Move, Copy, Rotate, Mirror, Trim, Fillet, Chamfer, Offset, Scale, Stretch — are in the ribbon group Edit. They work with the existing selection or ask for the elements after the start (post-selection: choose elements, then Enter or right-click). Clipboard: Ctrl + C, Ctrl + X, Ctrl + V (Clipboard). The overview is under Modify; the dimensioning commands are under Dimensioning.